It is good to Update your operating system and restart the laptop before proceeding further.
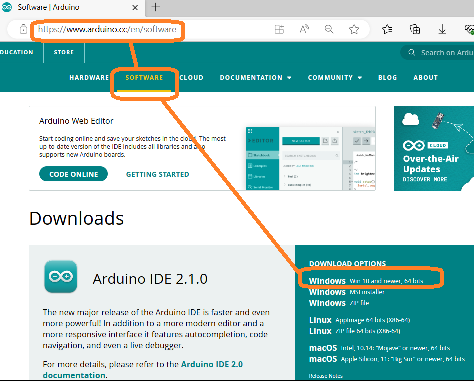
Download and install Arduino IDE (162MB)

Install CH340 Driver
Open the link below download and install CH341SER.EXE
Opens in new TAB http://www.wch-ic.com/downloads/CH341SER_ZIP.html
OR download from any other trusted website !
Physically connect Arduino Board to Laptop via USB cable
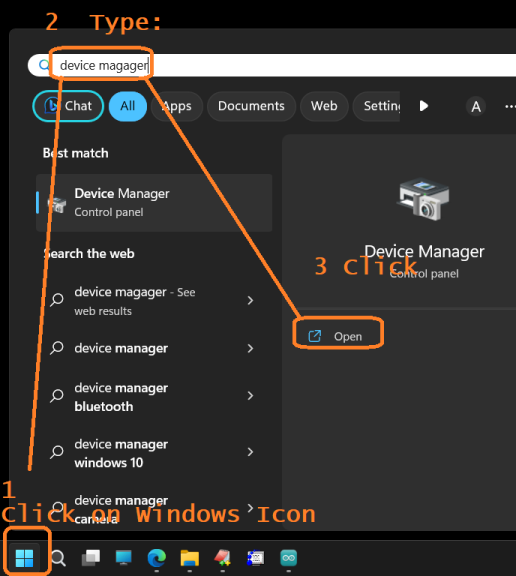
Open Windows Device Manger, note the COM port

Start the Arduino IDE app on your laptop

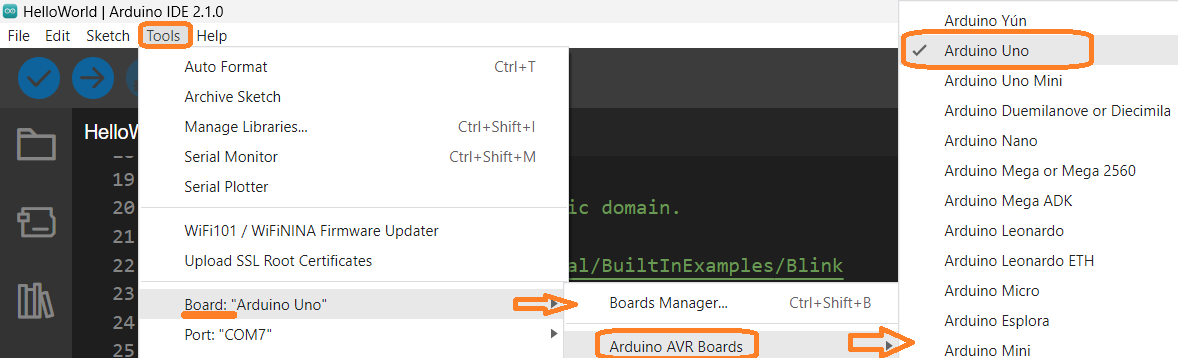
Select the Board: Click on Tools -> Boards -> Arduino AVR Boards -> Arduino UNO
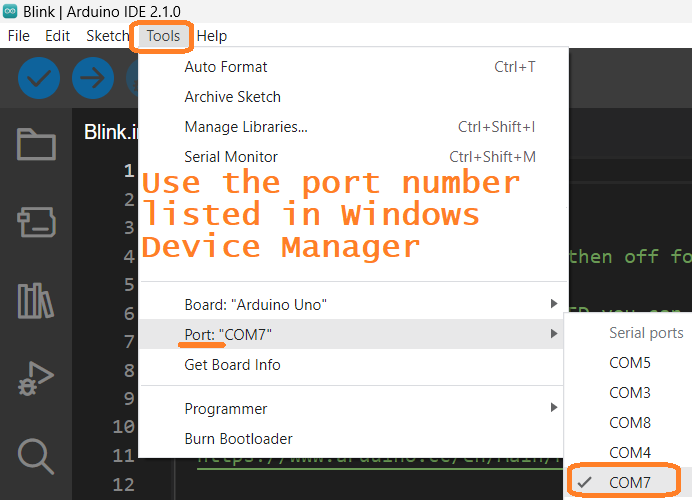
Select the Port: Click on Tools -> Ports -> COM_n (n = The port number you noted from Device Manager)
Files -> Examples -> 01 Basics -> Blink
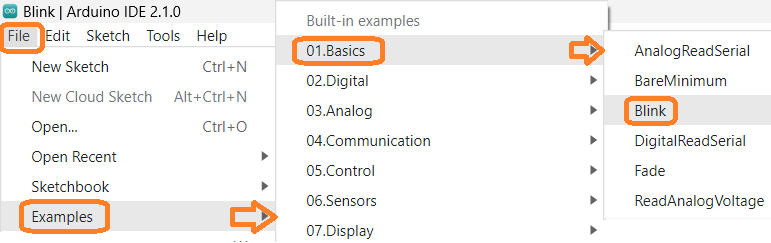
Make your own copy of the example, so that we may modify and save the changes
(because the Examples are read-only files for reference purpose)
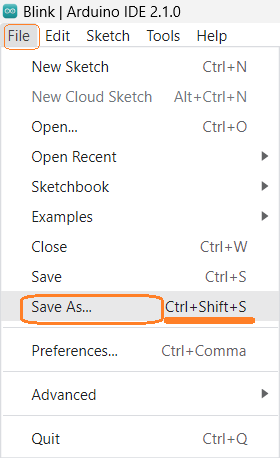
Files -> Save As -> HelloWorld
This will restart the Arduino IDE
(You may close the previous Arduino IDE window) to save RAM
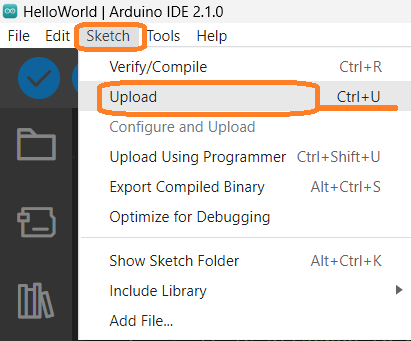
Click on Sketch Upload
To transfer the code from Laptop to Arduino Board
Notice the LED on the Arduino Board, it Blinks !
One second ON, one second off

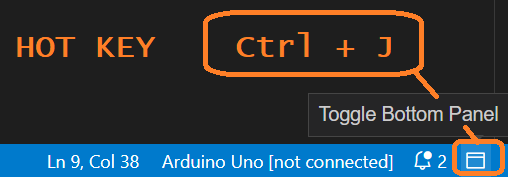
Press Ctrl+J to hide the Output window on Arduino IDE
On bottom-right corner of the window notice the Toggle Bottom Panel button
Modify line number 34. Replace 1000 with 200

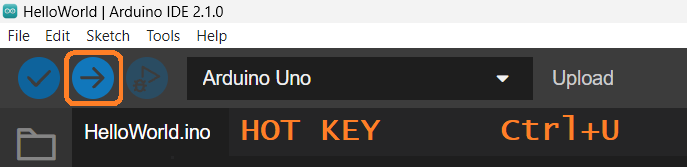
Save, Compile and Upload the code to Arduino just by pressing the Arrow button on Top Left corner of the IDE
Or press Ctrl+U to do the same
Notice the LED on the Arduino Board, it Blinks !
100 milli second ON, one second (1000 milli second) OFF
Experiment with values on Line 34 and 36
Change delay values and do some experimentation on your own.
Goto next exercise
Watch the YouTube Video:
Arduino Programming Basics : Part 1 (HINDI): LEDs and Seven Segment