A complete FREE tutorial on :
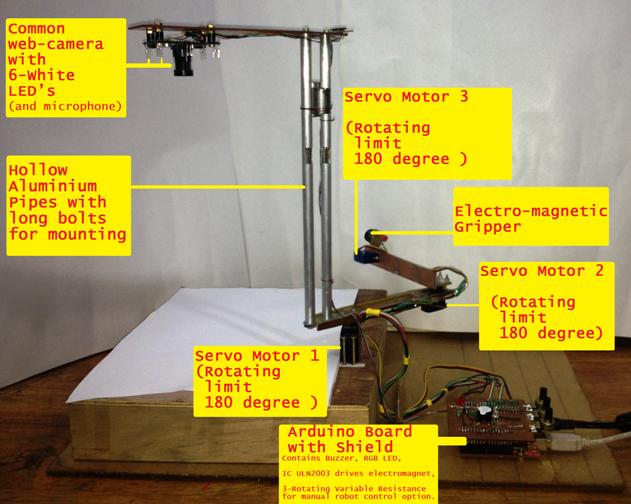
Developing a SCARA type Two Link Robotic Arm Model to play TicTacToe
Using: Arduino Duemilanove/UNO Board with Atmega328P Microcontroller
: AVR-Studio, Avrdude
: Servo Motors, Web Camera, Electromagnetic Gripper
Ultra Low Cost Design
(Click the image to enlarge)
 |
 |
 |
Introduction
After developing a typical Line following robot, the engineering students/hobbyists doesn't have a good robotics idea which fits in their budgets and can be practically realized.
An idea good enough to motivate the students for core-programming. Often the robotics hardware is mechanically and electronically complex and computer science students can't get a good hold on it. So, how will they learn robotics programming, without Robot Hardware ?
All the fascinating keywords like Machine vision, Image Acquisition & Processing, Game Strategy Algorithms, Artificial Intelligence, Graphic Simulation, Joystick Robot Trainer, Computer Interfacing, Robot Co-ordinate System, Inverse Kinematics, Synthesized Speech and so on, makes them think "If I had a robot, I could have tried these".
All the key-words mentioned in the above paragraph, can be used in expressing this Ultra Low Cost Robotic Arm's personality. Yet it costs less than INR3,500/- (See Bill Of Material BOM ).
Definitions
Salient Features of this Project
- Open-source Arduino board with AVR Atmega 328P micro-controller
- Uses C-language and MATLAB® Programming
- Tools WinAVR™ (pronounced "whenever"), Avrdude and AVRStudio are used
- The robot works in two modes: Autonomous and Manual
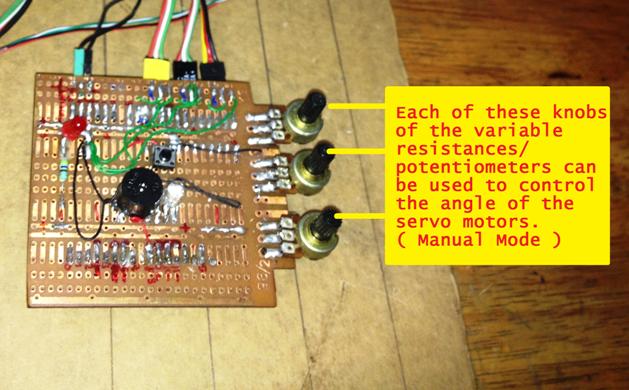
- The user can control the Robotic ARM with Rotatory Knobs in Manual Mode
- Manual Mode can be used to calibrate: Computed values versus Practical values
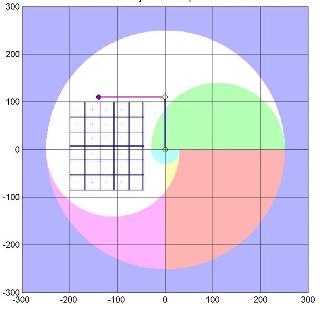
- Simulation and Animation is done using MATLAB® graphics
- The complete tutorial is provided, with working code examples.
- This project is good for intermediate to advanced level developers/students.
- Ultra Low Cost robotics hardware to experiment with
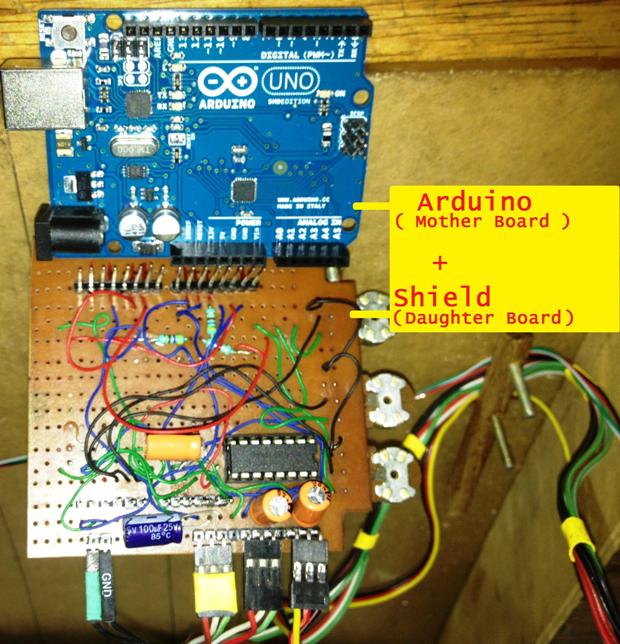
- Uses very few electronics components on the Arduino Shield
- Can be programmed to play multiple Board Games at the same time
- It is a generalized model: Provision for future expansion
- Uses Servo Motors so no motor driver ICs
- Optionally : Raspberry Pi and OpenCV can be used instead of Laptop, Arduino and MATLAB®
e-Book Chapters
COMING SOON (by mid-of-Sept-2013)(Please click on chapter number to display its contents)
| Part-I: Introduction to the Two Link Robotic Arm Model | ||||||||||||||
|
||||||||||||||
Part-II: MATLAB® Programming Tutorials: Robot Control and Mathematics |
||||||||||||||
|
||||||||||||||
Part-III: Microcontrollor Programming |
||||||||||||||
|
||||||||||||||
Part-IV: MATLAB® Programming Tutorials: Robot Vision |
||||||||||||||
|
||||||||||||||
Part-V: Notes/Appendix |
||||||||||||||
|
| The TLRAM2 in action:
|
 |